|

|
LiteHawk VENTURE - Blade Rotation Direction
-
Your new multi-rotor's blades spin in different directions, cool huh? This helps it to fly with increased stability and control. Here's an image that will help us see which blades spin in which direction.
|
 |
LiteHawk VENTURE - How To Charge
- Plug the charger into any standard 120V outlet. Green LED indicates standby.
- Place VENTURE away from any highly flammable objects or surface.
- Unplug the red battery connector from the VENTURE if plugged in.
- Plug the white connector on the battery into the charger. Red LED light indicates charging.
- Once the charger light turns from red to green, charging is complete. Approx. 45 minutes.
- Unplug the battery from the charger and plug in the red connector into the side of the quadrocopter.
Remember
-
Recharge the battery for at least 20 minutes if storing for more than 24 hours. Failure to do so will damage the battery pack.
|
|


|
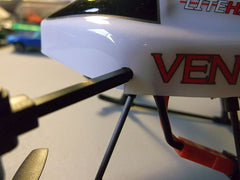
LiteHawk VENTURE - How To Remove The Body Cover
- To fit the canopy snugly onto the frame. Make sure that all body tabs are carefully wrapped around the frame. That's it - you are ready!
Some tips we found helpful:
- Simply locate the tabs holding the body on. There is one on each corner.
- Twist each tab and then carefully pull body up.
- Do this for all three, and the body will come off.
Repeat procedure when putting it back on.
|
|
|
LiteHawk VENTURE - How to sync.
- Turn ON the remote control
- You will see a flashing red LED light and audible beep indicating the power is on.
- Plug the battery into the VENTURE and place the VENTURE 4-6 feet away - You will see a flashing red LED on the VENTURE come on.
- Move the left stick on the remote up and down once
- In a few seconds the red LED on the VENTURE will be solid. This indicates that the model and the controller are bound. If the red LED is blinking slowly, they are not bound and you must repeat the process.
|
|

|
LiteHawk VENTURE - ESC
|


