NEON FAQ

|
|
LiteHawk NEON NEON is stunning! Just look at it! Unique two-piece design houses all the electronics, mechanicals and LED lighting systems in a sturdy structure. Even the rotor blades are protected! The LED's are enclosed in the rotor guards so NEON looks like nothing else available - the lights are very, very bright allowing you to easily see NEON day or night!
|
|
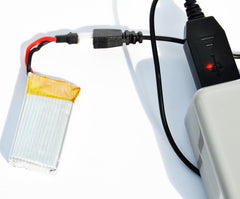
CHARGING YOUR NEON
|
|
How To Sync 1/ Make sure the model is turned Off and locate a flat level surface. 2/ Plug the battery into the NEON and turn it on. Place the NEON on the flat surface, you must do this within 5 seconds of turning the power switch ON. You will see flashing lights on the NEON start to blink. 3/ Turn on the power for the controller. You will see a flashing red LED light and audible beep indicating the power is on. 4/ Move the left control stick (this is also the throttle stick) all the way up, then all the way down. In a few seconds the blinking LED on the NEON and the blinking LED on the controller will both be solid. The model is now bound. The NEON MUST be on a flat surface in order to digitally self level itself, otherwise the model will not sync to the controller. |
|
LiteHawk NEON - First Flight If you’ve never flown then the first thing you need to learn is throttle control. Slowly and carefully ramp up the throttle until the model starts to lift off, then as soon as the model leaves the ground, ease off the throttle gently and let it settle back down. If the hardware is working correctly the model should remain fairly level, and shouldn’t drift too far. Repeat this process, lift off gently and then land again, until you have a good feel for how much throttle is required to keep the model in the air. Try keeping it in the air a little longer - don’t worry about pitch or yaw and - all we care about right now is that the model stays at a steady height. Don’t go more than a meter off the ground. If the model drifts too far, ease off the throttle and land it. When heading out to fly your model, it’s important to always use common sense. Do not fly in the following places: Near crowds or high voltage, near any obstacles, wind speeds over C (3mph), thunder, rain or snow or between high buildings. - Ensure nothing prevents the smooth running of the moving parts. - Do not dismantle or tamper with this R/C product or its transmitter. The manufacturer and distributor will accept no responsibility, expressed or implied, for accidents or injuries caused as a result of dis-assembly, modification and/or usage against the instructions for this product. - Ensure that all batteries are correctly installed and that the Li-Po battery is fully charged and in good condition. - Do not touch ANY moving parts during operation. |
|
LiteHawk NEON - Post Flight - When you have finished using your LiteHawk NEON you should first disconnect the Li-Po battery, then switch OFF the transmitter (press and hold power button for up to 3 seconds). - If you do not plan on using the quadrocopter for more than 24 hours, it is recommended that you recharge the battery fully before putting it away. - Remember to allow the battery to cool 10-15 minutes before recharging. |
| Standard/Sport Modes: Press once and you will hear one beep - you are in Standard Mode (response rates are at 50%). Press again and you will hear two beeps - you are now in Sport Mode 2 (response rates are at 75%). In Sport Mode 2, controls are much more responsive. Press again and you will hear three beeps - you are now in Sport Mode 3 (response rates are at 100%). This is an advanced setting and should only be used when you are comfortable flying your NEON. Sport Mode 3 is for outdoor use. Factory setting is Standard Mode. |
NEON ROTOR BLADE CARE

|


