|
How to charge the LiteHawk FREEDOM:
Your LiteHawk FREEDOM comes with a LiPo battery which is inside the model. The rechargeable Li-Po battery provides the power to propel your model at high speeds. You should expect 3-5 min run time. However you do need to make sure to properly maintain your Li-Po Battery.
- Li-Po batteries don’t like to be run down too low. If the voltage is dropped dramatically they will be damaged and will not recharge! Once the model starts to slow, fly your model to a safe place, walk over and turn it off.
- It is recommend to charge the battery after your run and to always store the battery with a charge. Never discharge or dead short a Li-Po battery!
Always have your model turned off when not in use. Make sure the switch is turned OFF.
1/ Plug the USB into your computer, TV, or USB charger. The LED light on the USB will turn RED.

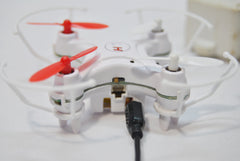
2/ Plug the other end of the cable into your Litehawk FREEDOM battery port located at the side of the model. Do not force the plug, it only goes in one way. The model must have the power switch in the OFF position. The LED light on the USB will turn OFF.
 
3/ Charge time can take up to 30 minute (shorter if charging for the first time). Once charged the LED light on the USB will turn back to solid RED.

Tip: If storing for more than 24 hours it is best to store with a fully charged battery. Failure to do so can damage the battery pack and shorten its useful life.
|
Synchronize The FREEDOM
- Turn on the Freedom and set it down on a level flat surface within 5 seconds from turning it on. All of its lights will be blinking.
 
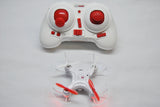
- Turn on the Radio and its power light will be blinking red, while giving a couple of audible beeps. The Drones lights will go solid, with the controllers audible.
  
- Move the left ( throttle stick ) stick up all the way to the top, and then move the stick down, and you will hear another beep from the controller. The controllers light will go solid, indicating that the drone and the radio are now bound.
 
|
LiteHawk FREEDOM- Building the Plane
A pair of tweezers and very small flat head screwdriver are handy tools for this. Everything fits together very snug. Don't forget, foam can compress a bit, to help the fit through tight holes. Foam has a lot of forgiveness, just don't poke holes into it.
-
- Make sure that you have the 4 Axis Buckle oriented so the wide flat edge is facing up, to help support the Wing when it goes on. Carefully press the two male clip ends on the 4 Axis Buckle thru the two holes in the body that are made for them. The body has a strip of strengthening plastic running down both sides of it where the holes are located to help protect the foam as you insert, and clip this attachment down tight. Use the tweezers to squeeze the attachment tight.

2. Just to make sure it fits correctly, and you have tried it once. Attach the Drone to the Buckle, White Rotor Blades on Top,and then attach the Tie Plate to the catches on the Buckle. It is easy to do now, but a bit more difficult once the Plane is built. If all seems good, remove the Tie Plate and Drone. Then finish building the plane.

3. Carefully insert the Drone Protector into the Wing. Squeeze, press, wiggle it in.. it will go, use the flat edge of the micro screw driver, just don't poke any holes.

4. Attach the body to the wing. Again, Squeeze and use the screwdriver to help press the legs thru the holes until you have them all thru and the wing is flush to the body. Now slide the wing all the way back as far as it will go to lock it in place.
  
5. Now you can manipulate the Drone back into the Plane and re- secure the Tie Plate to the 4 Axis Buckle.

6. There is a slit in the front of the Elevator. Slide the tail of the plane body thru the Elevator slit, until the front of the Elevator enters the opening in the body designed to accommodate it and allow for adjustments for flying level or gaining altitude.
 
|
LiteHawk FREEDOM- Charging and Synchronizing while in plane mode
Charging is still the same, make sure the start switch is turned off, and you can still plug the charger into the drone. Tip: a tooth pick is a handy finger to reach the start switch when you have the drone loaded into the plane body.
 
Synchronizing the FREEDOM is also .. sort of the same. It still has to be started on a level surface, only you are going to create that level .. spot. Easy to do. Just Sync' it while holding the tail of the plane pointing it straight up..

the drone is level! Once Bound, don't forget to press the button to put it into plane mode. Give yourself lots of room.. school yard, park. Pitch it slightly upwards into the wind. All functions are controlled by the Left stick, throttle, left and right. Now go!! HAVE FUN!!
|
LiteHawk FREEDOM- Accessing Body Halves, Motors, Battery and ESC
If you need to replace a Motor or the ESC/Receiver, you will need to do some soldering to replace them. If you need to replace an upper or lower body half, it is fairly easy to do.
First you need to remove all four rotor blades, taking note of exactly which blade goes on which motor , as the same one has to go back on that motor to be able to fly.

Next, remove the four screws that secure the two halves of the drone together.

Now take a small flat head screwdriver and gently lever the clips holding the the drone halves together at the motor pods.

Carefully separate the top half from the drone, and then separate the bottom from the ESC and motors.
 
Removing a motor from the ESC will require desoldering 2 wires and soldering 2 back back in place. Removing the ESC will require desoldering all 8 motor wires and 2 battery wires and soldering them to a new ESC.
 
|


