CLICK AUTO FAQ
|
Welcome to our FAQ area for LiteHawk CLICK AUTO. Tips and tricks, along with step by step User Guides are right here. Check our Overview video for even more info!
|
 
|
|
LiteHawk CLICK AUTO Features:
|
|
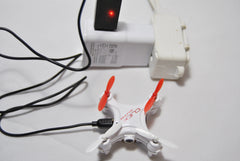
How to charge the LiteHawk CLICK AUTO: Your LiteHawk CLICK AUTO comes with a LiPo battery which is inside the model. The rechargeable Li-Po battery provides the power to propel your model at high speeds. You should expect 3-5 min run time. However you do need to make sure to properly maintain your Li-Po Battery. 2/ Plug the other end of the cable into your Litehawk CLICK AUTO battery port located at the side of the model. Do not force the plug, it only goes in one way. The model must have the power switch in the OFF position. The LED light on the USB will turn OFF.
3/ Charge time can take up to 30 minute (shorter if charging for the first time). Once charged the LED light on the USB will turn back to solid RED. Tip: If storing for more than 24 hours it is best to store with a fully charged battery. Failure to do so can damage the battery pack and shorten its useful life. |
|
Synchronize The CLICK AUTO


|
|
Rotor Blade Care
Blade Removal
Blade Replacement
 |
|
Micro SD Card Management

|
|
Your LiteHawk Drone is equipped with a barometric sensor which allows for Altitude hold capability. The Drone will maintain your desired height while flying. ALTITUDE HOLD: You will notice the left stick is spring loaded. To gain or increase altitude (height) push the stick up. To lower altitude (height) push down. Once you get to a desired altitude release the stick and the drone will stay at that height. AUTO TAKE OFF: Press the Auto Take off button to launch your drone. This will launch your drone to a comfortable height (Exact height may differ). AUTO LAND: Press the Auto land button and the drone will land itself. |


