Description
Charging the XL AUTO's Battery. P.S. The Info Manual is wrong. You can not charge the battery by plugging the charger into the side port on the Heli'. That side port is where you plug the connector from the battery into your heli. To charge, you must plug the connector from the battery into the charger. Tip: Always keep your Heli' turned off, unless you are set to fly.

Plug your USB charger into a power source, and the LED light will come on Solid Red.

Now plug your battery connector from the heli', into the USB charger, and the LED light will go out, indicating charging.

A full charge should take about 45 minutes, and the LED light will come back on solid Red, indicating a full charge.

You should expect about 5 to 8 minutes of flight time. Care must be taken with your battery, never let it run right down, it will damage the battery and may not charge. When the heli' starts to slow down, stop, let the battery cool off for 10 minutes then recharge ( recharging a hot battery can cause damage as well.) Tip: If storing, it is safest to store with a fully charged, or at least 65% charged, and left unplugged from the heli'. If storing for more than two months, start maintenance charges to prevent battery deterioration.
To Replace a Battery. To begin, remove the Canopy,
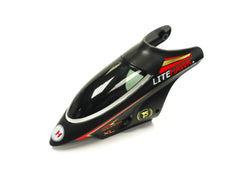
XL AUTO Collector's Edition - Nose Cone/Canopy: Is a one piece, tough, polycarbonite plastic that protects the electronics gives good air flow, around and through the Canopy. Also has that prevalent Hawks nose profile, and looks great. It is held on to the chassis at four solid points of attachment with four stainless steel screws. Two on each side. Tip: Don't screw the little screws down too tight.. just snug is great. If you over do it, the mounting post spot will strip. It can be repaired with a bit of Epoxy. Just fill the hole, let if fully dry, then drill it out very carefully. You may be able to just use the screw to make the hole, but be careful.


then you need to snip the zip tie that holds it in place. You will need a new one to replace the one you snip.

Tip: A strong double sided tape is often good enough, between the battery and the mount it is tied too, or best use both. Especially if you are going to change the center of balance for a more aggressive forward flight. When remounting the battery, just mount it more forward into the nose, it will give a bit more weight to the front and change the pitch of the blades so it moves forward better. I still add a bit more weight in the nose of the canopy as well ( small ball of Plasticine about the weight of a nickle ) Take note of how the battery is oriented so that you can twist the wires around the landing gear correctly.


Easy, reattach the Canopy, and go flying.