Description
MINI NEON ROTOR BLADE CARE
- The physical design of NEON provides some impact protection to the rotor blades by surrounding each blade with a ring. While this can save a blade in most collision situations, blade damage can still occur by contact with the tip of a tree limb, or some other small body that can't be excluded by the rings. Should you break a rotor blade, it's extremely easy to replace it!
- To remove a rotor blade, simply grasp the rotor blade with one hand (topside) and the motor pod with the other (underside) and pull the rotor blade off the motor shaft. Gentle but firm effort is all that's required.


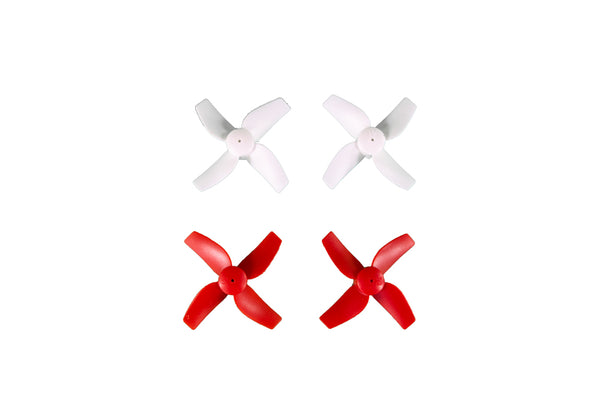
- Each rotor blade has a unique color and blade pitch. The 2 white and 2 red blades that you are given as spares are each an identical match to the ones on the Drone. Each blade is just a little bit different from each other. Either color or pitch of the blades are different, and the correct blade must go to the correct motor or it won't fly. I the picture blow, you can see the 4 blades, and how the 2 middle ones, are different colors but have the same twists or pitch to the blades. The 2 outside blades are again different colors, but again have the same twists or pitch to there blades, but the pitch of the outside blades is opposite of the ones circled in the middle.

- Rotor blades are stamped with an A or B designator that indicates its position. Be sure to select and install the correct rotor blade.

- To install a rotor blade, slide it onto the motor shaft until it is fully seated. Again, gentle but firm effort is all that's required. Check the freedom of the blade by giving it a flick with your finger, if it feels too tight in comparison with the others, just pinch it back a very tiny bit and flick it again.
- Hair and other fiber can wind itself around the motor shafts, possibly causing drag and reducing performance. To remove the wound hair or fiber, remove each rotor blade, pull off the accumulation, and replace the blade as outlined above.


