-
285-1249 SWIFT Pushrods for Aileron
-
$2.00 $4.00
-
is back-ordered. We will ship it separately in 10 to 15 days.
-

Description
SWIFT Aileron Pushrods are the control wires from the Servo to the Ailerons.
LiteHawk SWIFT - Assembling Replacement Main Wing / Aileron Servo
This DIY instruction set assumes you have ordered replacement kit "Wing w/ Servo Set" 285-1252 which includes all pieces required to build a replacement Main Wing assembly. THIS IS THE RECOMMENDED WAY TO PROCEED.
A few components can also be ordered separately If required. This DIY instruction set still serves to direct their installation. Wing Servo Set 285-1247, Pushrods 285-1249 and Control Horns 285-1250
|
- Preparing the Wing Servo Set 285-1247.
|
|
- Install Control Horn 285-1250 in each aileron (2) (DIY shown above).
|
|
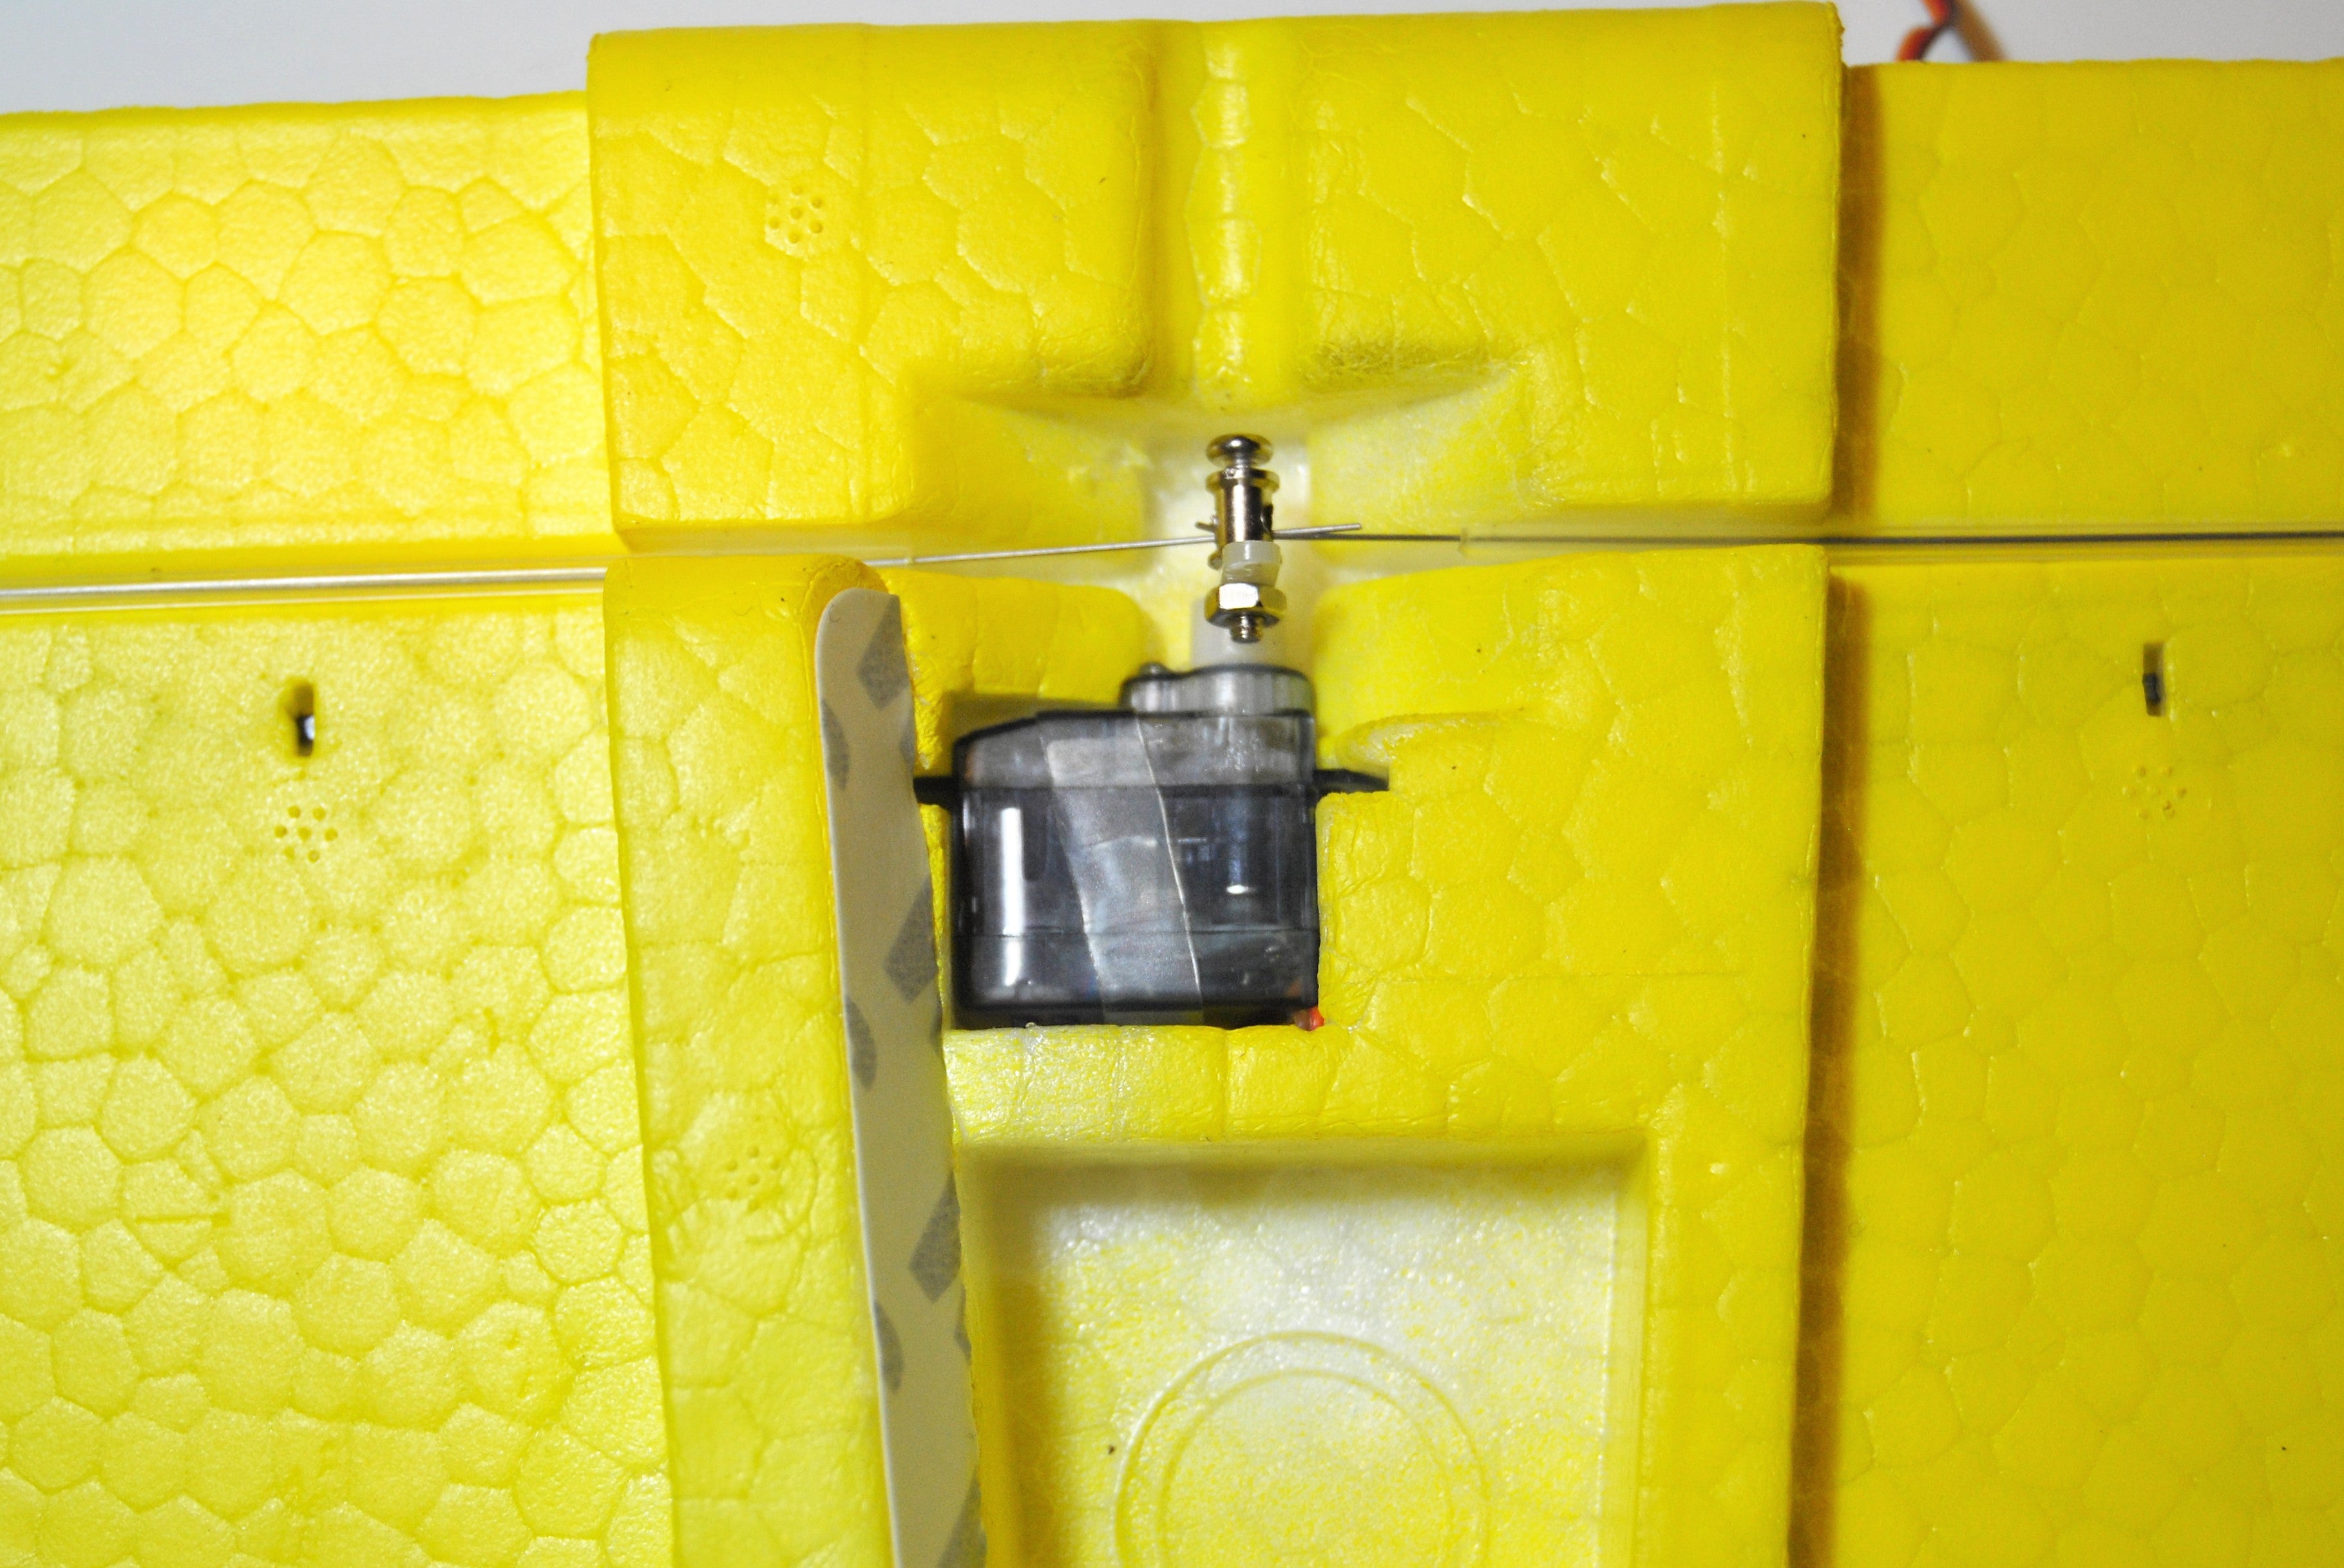
- Run the servo wire through the wing and install the Wing Servo Set onto the wing as shown.
|
|
- Insert the Pushrod through the included pushrod ties and insert the kinked ends of the Pushrods through the Control Horns.
|
|
- Insert the straight ends of the Pushrods through the Pushrod Clamp. Be sure the servo horn is centered and Ailerons are neutral. Tighten the Clamp screw.
|
|
- Apply the included decal as shown.
|