
Description
Battery for the FREEDOM has to be soldered in place.
How to charge the LiteHawk FREEDOM:
Your LiteHawk FREEDOM comes with a LiPo battery which is inside the model. The rechargeable Li-Po battery provides the power to propel your model at high speeds. You should expect 3-5 min run time. However you do need to make sure to properly maintain your Li-Po Battery.
- Li-Po batteries don’t like to be run down too low. If the voltage is dropped dramatically they will be damaged and will not recharge! Once the model starts to slow, fly your model to a safe place, walk over and turn it off.
- It is recommend to charge the battery after your run and to always store the battery with a charge. Never discharge or dead short a Li-Po battery!
Always have your model turned off when not in use. Make sure the switch is turned OFF.
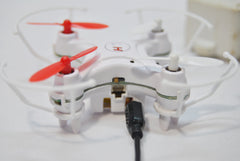
1/ Plug the USB into your computer, TV, or USB charger. The LED light on the USB will turn RED.

2/ Plug the other end of the cable into your Litehawk FREEDOM battery port located at the side of the model. Do not force the plug, it only goes in one way. The model must have the power switch in the OFF position. The LED light on the USB will turn OFF.

3/ Charge time can take up to 30 minute (shorter if charging for the first time). Once charged the LED light on the USB will turn back to solid RED.

Tip: If storing for more than 24 hours it is best to store with a fully charged battery. Failure to do so can damage the battery pack and shorten its useful life.
|
LiteHawk FREEDOM- Accessing Body Halves, Motors, Battery and ESC If you need to replace a Motor or the ESC/Receiver, you will need to do some soldering to replace them. If you need to replace an upper or lower body half, it is fairly easy to do. First you need to remove all four rotor blades, taking note of exactly which blade goes on which motor , as the same one has to go back on that motor to be able to fly. Next, remove the four screws that secure the two halves of the drone together. Now take a small flat head screwdriver and gently lever the clips holding the the drone halves together at the motor pods. Carefully separate the top half from the drone, and then separate the bottom from the ESC and motors. Removing a motor from the ESC will require desoldering 2 wires and soldering 2 back back in place. Removing the ESC will require desoldering all 8 motor wires and 2 battery wires and soldering them to a new ESC. |


