ZOOM GUIDES

|
|
LiteHawk ZOOM Instruction Manual
|


|
LiteHawk ZOOM - How To Sync 1. Switch the transmitter power ON. 2. Plug in the plane's battery. 3. Push the left hand joystick from the bottom all the way to the top, and then back and rest in the bottom position . This may take a few seconds to sync. The radio will also beep twice and the blinking green light will change to a solid green color . 4. Unplug the plane battery , then turn off the radio .Your LiteHawk ZOOM is now bound and ready to fly! This only needs to be done on initial set-up. LiteHawk ZOOM - Radio and Plane Lose Bind The binding process effectively ties the transmitter and receiver together. Under normal circumstances, both items are supplied like this from the factory and you sync them during the Activation process. However if you find that your transmitter and receiver are not bound (no response to transmitter controls) you should do the following: 1. Press and hold any trim button on the transmitter while turning ON the transmitter’s power. The transmitter will continuously beep and the power indicator will blink really fast. 2. Within 5 seconds, install the plane’s battery and the beep will stop and the power indicator will blink slower. 3. Push the left throttle joystick to top and bottom. The transmitter will beep twice, and the transmitter and receiver lights will be ON solid. The transmitter and receiver are now bound. NOTE: If you fail to install the plane’s battery within 5 seconds and the transmitter stops beeping, please repeat the binding process above. LiteHawk ZOOM - Hand Launching To insure a good flight, make sure the area you are flying in is open and free of obstacles. When first learning how to fly, give yourself lots of room to fly and land in. As you get more experienced and have more control of your LiteHawk ZOOM you can fly in smaller areas. Early mornings or dusk are great times to learn how to fly, because winds are at their calmest. When flying in a field with tall grass or uneven ground, remove landing gear and belly land the ZOOM. - Stand in the middle of the wide area, facing the wind. (Remember under 5km/h wind). - Hold the plane in your right hand. - Move the left joystick (throttle stick) to max power. - Toss the plane into the wind at a slightly upwards angle. This is the easiest and best way for beginners first flights. |
|
|
LiteHawk ZOOM - Installing Landing Gear Find the main and rear landing gear in the ZOOM box. Flip over the ZOOM and you will see two slots...slide the front gear (with two wheels) carefully into the front slot. Slide the rear gear into the rear slot, making sure the wheel leans toward the back. |


|
|
LiteHawk ZOOM - Battery Install Flip over the ZOOM, and right below the prop you will see a compartment. This is the battery compartment. It has the battery cable sticking out of it, and a velcro strip. Plug the battery into the cable, making sure the slot on the battery is in line with the connector tang (piece sticking out from the connector). The bind light will come on.Push the cable inside the slot and line up the velcro strips. Press down so they stick together. |


|
|
LiteHawk ZOOM - Propeller Change - Here are some steps to follow for changing your propeller. - The first picture shows a side view of the plane, notice the small gap between the propeller and plane where you can see the silver shaft of the motor. Grab this carefully with a pair of needle nose pliers and hold it firm. Gently twist the old propeller off the plane. - Once the propeller is off, replace it with the new one (make sure to hold the motor shaft with needle nose pliers, now simply twist on the replacement propeller). Tada! |


|
|
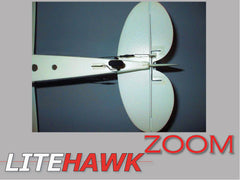
LiteHawk ZOOM - Main Wing Removal and Installation
|


|
|
LiteHawk ZOOM - Decal Placement - Here is a how to guide on proper decal placement to make sure your ZOOM flies steady and smooth! - In the first set of pictures we see the front of the plane. Notice that on both sides the decal slightly goes over the ridge of the nose cone. There is still a small gap between the sticker and the engine accents on the front of the plane. - The second set of pictures shows the rear of the plane and the decals stop right at the opening where the rudder controls come out of the fuselage. - Now lets place the decals on the wing of the aircraft! You will notice the LiteHawk sticker on the top left side of the wing, it is placed in the middle of the wing with the outside edge placed slightly past the end of the faux/false Ailerons lines on the wing. - Now for the planes last sticker, the identification numbers! This is placed on the underside of the opposite wing to even out the balance of the aircraft. - There you have it, your ZOOM looks new again! |


|
|
LiteHawk ZOOM - Loose Motor Fix Have you experienced a crash? Is the front motor loose and wobbling up and down? Here is a quick fix to get you up and flying again. - The great news is, you don't have to disassemble the whole plane - the small front nose section can be cut to easily expose the motor and allow you to glue it back in place. - Take your time! The plane is foam and you don't want to force anything. 1. Make Note of the RED line drawn on the airplane. This is just after a small ridge on the nose cone. We use this as a reference spot to cut a straight line across the top of the nose. You can remove the propeller if you want or leave it on. Pull Back the decals from the front of the plane about 2-3cms. The stickers don't need to be completely removed. 2. Once you have cut the top of the nose you will need to cut along the line where the two halves of the fuselage join. This will allow you to pull the small nose piece off. Switch the transmitter power ON. 2. Plug in the plane's battery. |


