QUATTRO FAQ


LiteHawk QUATTRO Instruction Manual


LiteHawk QUATTRO - Blade Rotation Direction

  • Your new QUATTRO has 2 pairs of unique blades. One pair is “A” and one pair is “B”. You can easily tell by closely looking at the top of the rotor blade, there will be a stamp indicating “A” or “B”. All “A” blades spin in a clockwise direction while all “B” blades spin in a counter clockwise direction.


LiteHawk QUATTRO - How To Charge

Before charging the battery, please ensure that you have read ALL of the information on page 2 of this manual, download is above. Failure to do so will increase the risk of a potential problem.
  • 1. Plug the supplied wall charger in to any 120V outlet. *Green light indicates there is power going to the charger*
  • 2. Remove the Battery from the underside of the toy. *Keep the battery away from any flammable objects*
  • 3. Plug the red connector from the battery into the charger. *The LED will change from GREEN to RED indicating that the battery is charging*
  • 4. Once the LED changes from RED to GREEN, un-plug the battery from the charger. *Charge time is approximately 1 hour* Do NOT let battery charge for more than 2 hours.
  • 5. Re-install the battery into the toy.
It is normal for the battery to get warm during the charging process. Do not charge the battery on a surface that is flammable or can be damaged by heat. 
  • Do not leave the battery and charger unattended while charging.
  • Do not store the battery plugged into the charger

LiteHawk QUATTRO - Post Flight

  •  Remove the battery from the model and allow it to cool for 10-15 minutes.
  •  Recharge the battery for at least 20 minutes if storing for more than 24 hours.
  •  Check the model for damage or any possible issue that may affect your next flight.

LiteHawk QUATTRO - Make sure the body cover fits snugly to the frame

  • To fit the canopy snugly onto the frame. Make sure that all body tabs are carefully wrapped around the frame. That's it - you are ready!

LiteHawk QUATTRO - Pre flight procedure (How To Sync your QUATTRO to the Remote).

  • Plug the battery into QUATTRO and place QUATTRO on flat surface about 6 feet away - You will see a flashing blue light come on. The blinking will slow down once QUATTRO has leveled itself.
  • Turn ON the remote control - You will see a flashing red LED light and an audible beep indicating the power is on. Move left control stick all the way up, then all the way down. The LED will go solid after a few seconds. 
  • In a few seconds the blue LED on QUATTRO will stop blinking - this means that the model and the controller are bound. You are ready to fly!


LiteHawk QUATTRO - Learn Which Blades are "Front" and which are "Rear"

  • Learning to fly should be done tail in, meaning tail pointing toward you in flight. On the rear of the QUATTRO, you will see that the blades are red. Remember that this is the rear, by remembering RED for REAR.
  • With nose in hovering, the blades are white. Remember that this is the front, white, by remembering WHITE for WINDSHIELD. 
 LiteHawk QUATTRO - First Flight.
  • If you've never flown then the first thing you need to learn is throttle control. Slowly and carefully ramp up the throttle until the model starts to lift off , then as soon as the model leaves the ground, ease off the throttle gently and let it settle back down. If the hardware is working correctly the quad should remain fairly level, and shouldn't drift too far. Repeat this process, lift off gently and then land again, until you have a good feel for how much throttle is required to keep the model in the air. Try keeping it in the air a little longer - don’t worry about pitch, yaw and roll - all we care about right now is that the model stays at a steady height. Don’t go more than a meter off the ground. If the quad drifts too far, ease off the throttle and land it.
  • Once you are able to hold the quad at a steady height, try moving the right stick gently to start controlling the model’s direction. If the QUATTRO moves left, move the stick slightly to the right. If it starts moving towards you, push the stick up slightly. Get the feel for how the QUATTRO moves around while using the right stick. Remember, if at any point the QUATTRO moves out of position, especially if it starts coming towards you, cut the throttle immediately. Repeat this process until you are comfortable with how the right stick controls the QUATTRO.
 LiteHawk QUATTRO - How to get stable hover? My QUATTRO veers off to the Left (or another direction) at lift off.
  • For any Multi-Rotor with 3-axis gyro, start up initialization is paramount. If it is not initialized right, it will not fly right. Therefore, the best way to initialize the gyro is to first find a level surface. Connect the battery to the QUATTRO, and promptly (with in the next few seconds), turn it right side up, place it on the level surface, and do not touch it until it is done initializing. At the end of the initialization, the blue LED in the QUATTRO will glow solid. If the controller is OFF during this process the blue LED will flash slow until the controller is turned ON. 
 LiteHawk QUATTRO - What happens when the battery voltage gets low on the QUATTRO?
- When the battery gets low on the QUATTRO the onboard low voltage protection activates shutting down the rotor motors. All LEDs will remain lit and solid on the QUATTRO.

Throttle Trim

  • If your Quattro starts to throttle up when you turn it on, with the throttle in the neutral position (at the bottom), then you have to press the bottom button on the throttle trim until it stops. After setting 

For pitch, roll, and yaw

  • Place the QUATTRO on a smooth, flat, level surface. This will reduce the amount of throttle needed when checking for trim adjustments and it will be easier to identify needed trim adjustments. As you increase throttle, you may find that the QUATTRO could want to crawl in one direction or another. Trim adjustments on the Pitch, Roll, or Yaw trim buttons will correct this.

Pitch Trim

  • If the QUATTRO is moving forward, push the trim button on the bottom until the QUATTRO stops. If the QUATTRO is moving backward, push the trim button on the top until the QUATTRO stops.

Roll Trim

  • If the QUATTRO is moving to the left, push the trim button on the right until the QUATTRO stops. If the QUATTRO is moving to the right, push the trim button on the left until the QUATTRO stops.

Yaw Trim

  • If the QUATTRO spins counter clockwise, push the trim button on the left until the QUATTRO stops. If the QUATTRO spins clockwise, push the trim button on the right until the QUATTRO stops.

How To Flip!

  • First off .. to flip you must activate two switches at the same time, you should have the basics of flying your QUATTRO around Forwards, Backwards, Left and Right. The two switches are the Right Control Stick and the Flip Button on the top right side of your Radio.
  • The first thing you have to think about is how high up do you need to be in order to flip.
  • Any flip you do the QUATTRO looses height! It will all depend on the speed that you are going when you push the button, so you will need to experiment. So to Flip forward.. pushing the right stick forward and pushing the flip button at the same time creates your forward flip.
  • Backward Flip.. you push down on the right stick and push the flip button at the same time.
  • Flip Left.. You push the right stick to the left and push the Flip button at the same time.
  • Right Flip.. You push the right stick to the right and push the flip button at the same time. Right Flip.. You push the right stick to the right and push the flip button at the same time.
 

LiteHawk QUATTRO - How to Replace the Rotor Blades

  • First, find the screw on the rotor shaft. Unscrew all the way, and slide rotor off. Reverse procedure to replace, making sure that the torque flats and screw holes line up. Remeber each rotor has a designation which refers to the intended direction of rotation - A or B. Match the position of the rotor you are replacing with an appropriately selected replacement rotor.


LiteHawk QUATTRO - How to Replace the Battery

  • Replacing your battery is really simple. Turn your QUATTRO upside down and take note of the position of the battery cable - and that the fold at the top of the battery is facing down or away from the QUATTRO
  • Now just gently slide the battery out. It fits in the straps snuggly, it can only be taken out and put back in one way because of the stop built on one side of the battery housing. This makes for super easy battery change out!

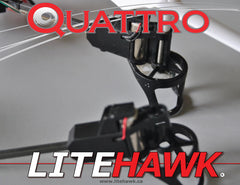
LiteHawk QUATTRO - How to Replace the Landing Assembly

  • To remove the landing assembly, you must first remove the the rotor blade.
  • With the rotor off, the gear set will drop right out and you can set these aside. 
  • Now remove the screw that holds the motor retainer in place
  • Now..Firmly, and carefully, slide the motor retainer back along the carbon arm.
  • There will be resistance to this caused by a small locator pin on the underside of the motor retainer and the led light strip.
  • A very firm pull is necessary to move it back..be careful, it will move.
  • Now you can lift the motor right out, and remove the screw holding the landing assembly on.
  • Slide the landing assembly off.
  • To reverse the process putting the landing assembly back on, take note that there is a small square hole.. on top of the square hole that the carbon arm is inserted into, this is space made for the wires to the motor as you slide the assembly back on.
  • When you have the landing assembly located on the carbon shaft correctly put the correct screw back in and slide the motor back into place. Now slide the motor retainer back over the led light and over the locating pin.
  • On the right hand side of the motor retainer there is a small gap that the motor wires come out at, this is to ensure for space so that the retainer will snap over the little pin and locate the retainer correctly, to hold the motor correctly.
Completion:
  • Replace the screw holding the motor retainer, put the gear set back in and attach the rotor blade.
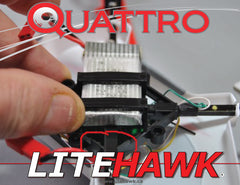
  LiteHawk QUATTRO - ESC Wiring Guide

LiteHawk QUATTRO - How to change the ESC

  • If you have to change the ESC in your QUATTRO. it is very easy. First carefully remove the body. Then arrange your QUATTRO with either both red blades or white blades facing you. Then arrange your new ESC in the same orientation as the one still on the QUATTRO. This is so that you will not get confused with which plug goes where.
  • Now you have to carefully pull all the plugs from your old ESC, and remove the 2 screws holding the ESC to the frame.
  • Remove your old board, and locate your new ESC to the frame by using the location pins on the frame and the holes on the board with the same orientation as the old board, and replace the 2 screws.
  • Now you can plug in all the wires back where they belong, All your plugs with a yellow wire go into the red receptacles and all the green and blue wires go into the white receptacles.
  • Just in case you lost the orientation of your QUATTRO. the blue wires are the rear of the QUATTRO and the green wires are the front of the QUATTRO, so that both blue wires are towards the red rotors, and both green wires are towards the white rotors.
Completion: 
  • Put your body back on carefully, making sure that all the little tabs are holding it on. You will need to rebind your new ESC and Transmitter, then you are set to fly again.
 

 LiteHawk QUATTRO - How to Replace the Rotor Assembly Complete W/Motor and Carbon Strut

- Replacing this complete rotor assembly will save you from soldering work. You will need a piece of shrink tubing large enough to pass over the motor plugin.
- The assembly that you are replacing must have the correct motor in it as you have an A and B rotor blades, you also have an A and B motors. "A" motor assembly has a white wire and a black wire.
- "B" motor assembly has a red wire and a black wire.
- You must be careful to put the right assembly in the right place. Begin by removing the body and disconnecting the two power leads from the ESC to your assembly.
- Hold the main chassis firmly from underneath and pull the carbon strut from it. It will be very snug, so a very firm pull will be necessary.
- With a hobby knife, carefully remove the shrink tubing that is holding on the LED light strip.
- You will need this strip on your new assembly. Cut a piece of shrink tubing long enough to cover the solder points and any bare wire on the LED strip.
- Place the light strip on the under side of your new assembly pushing the strip into the motor housing as far as it will go. Place the shrink tubing over the carbon strut and the light strip.
- Keeping the strip all the way into the motor housing carefully shrink the tubing covering the bare solder points at the end of the strip, but don't let the tubing move off of the light strip. This is to secure the LED strip into its correct position and hold it to the carbon arm.
- Folding the power wire for the motor back along the top of the carbon rod, carefully insert the rod into the chassis, there is a space in the chassis for the wires that you have folded along the rod.
- Push the assembly all the way in that you can. It should almost butt up against the shrink tubing, maybe a millimeter of space between. Reattach power wires, Yellow wire to the red socket, green to the white socket.
- Now you will need a few things from your old assembly. The Gear set, two bushings and your rotor blade. Press your bushings into place and reassemble your gear and rotor blade, mount the body and you are all done.