BLAST FAQ

 Welcome to FAQ for LiteHawk BLAST! Simple tips and tricks are just below - check our Overview video for even more info!

 Welcome to our FAQ area for LiteHawkBLAST. Simple tips and tricks are just below.


LiteHawk BLAST Features:

  • Polycarbonate body shell  and is available in Red or Blue.
  • Did you know it's the very same material used in bullet-proof vests? It's strong and flexible, so this outer skin helps protect your new R/C vehicle.
  • We also paint the body "from the inside" so it is very resistant to scuffs and scratches!
  • High Travel Friction Shocks are standard equipment on BLAST
  • Soft All-Terrain Rubber Tires for superior grip and performance
  • 2.4Ghz Digital Pistol Grip Controller with soft steering wheel gives you fully proportional control.
  • Includes Wall Mount Charger and NIMH Battery

LiteHawk BLAST - Let’s Hit The Road

When heading out to drive your model, it’s important to always use common sense. Driving in an abusive and or rough style will only result in damage, broken parts, or poor performance. The ESC system is not waterproof. Avoid driving through puddles, mud, or snow. If water gets into the electronics it could damage them.
- Avoid overloading your model. Never run it in areas where its movement will be restricted, e.g.thick grass, weeds, mud etc. as this can over stress the motor and bind the drivetrain.
- Ensure nothing prevents the smooth running of the moving parts.
- Do not run your model in confined spaces. This is an outdoor toy, do not run in your home.
- Never run your model in a public space where it might upset or endanger people or wildlife.
- Immediately discontinue use of your vehicle and transmitter if you see lightning or hear thunder. Never use your vehicle in the rain.
- Do not dismantle or tamper with this R/C vehicle or its transmitter. The manufacturer and distributor will accept no responsibility, expressed or implied, for accidents or injuries caused as a result of dis-assembly, modification and/or usage against the instructions for this product.
- The transmitter’s range will vary depending on your surroundings and battery strength. Do not operate the model too far away or control could be lost (stay within 20-50 ft).
- Ensure that all batteries are correctly installed and that the battery is fully charged and in good condition.
- Do not touch ANY moving parts during operation.
- Don’t run in public roads with traffic!

LiteHawk BLAST -LiteHawk R/C Car and Truck Terms 101
Transmitter: The hand-held radio unit that sends throttle and steering inputs to your model. Also known as the radio or controller.
Servo: Small motor unit in your model that operates the steering mechanism.
ESC: The Electronic Speed Control provides digital proportional throttle control to the model’s motor based upon your throttle input on the radio.

LiteHawk BLAST - NIMH Battery and Charger Instructions:

Your New LiteHawk comes with a rechargeable NIMH 7.2 Volt battery. This battery powers the vehicle.
Please read the following information before using your new LiteHawk.

STEP 1: Remove the wall plug charger from the package and plug it into the wall. When plugged in a green LED light will come on.


STEP 2: Connect the 7.2 Volt battery to the charger. The green LED light will turn to red.


STEP 3: When the LED indicator light on the charger turns back to green, the battery is fully charged.


Charge times are (3.5-4.5hrs) do not leave on charge overnight. Battery should be unplugged from the charger after a maximum 8 hours.
STEP 4: Unplug the battery from the charger and remove the charger from the wall plug.
STEP 5: Install battery into your vehicle.

During charging:
- It is normal for the battery to get warm during the charging process. Do not charge the battery on a surface that is flammable or can be damaged by heat.
- Do not leave the battery and charger unattended while charging.
- Do not store the battery plugged into the charger

LiteHawk BLAST with Li-ion Battery

- Charging the 7.4V Li-Ion Battery
- The 7.4V battery and charger will get warm while charging. This is normal. Do not charge on, or near to, a material or surface that is flammable or one that can be damaged by heat.
- The 7.4V battery can be re-charged many times before it needs replacing. When the 7.4V battery no longer holds a charge it should be properly recycled. DO NOT THROW IN HOUSEHOLD WASTE!
- Your LiteHawk Blast will typically run for around 8 minutes on a fully charged 7.4V battery. As soon as you notice a drop off in speed you should bring the model to a safe place to stop. Turn your model off, let the battery cool down for ten minutes and then recharge it. If you are going to store the model for any length of time, you should fully charge the battery to prevent damage.

LiteHawk BLAST - Battery Installation
Place your BLAST on a clean flat surface. Avoid areas where small parts may be lost. The battery is housed in the battery compartment located in the bottom of the chassis. You will see the lock bar or post that runs across the chassis with a body clip holding it in place.


- Remove the body clip and remove the lock bar, open the battery compartment door.

- Pass the battery connector through the hole located in the bottom of the battery compartment, out towards the ESC.


- Place your fully charged battery in the battery slot.

- Close the battery compartment door and slide the lock bar back into place. Secure by re-installing the clip. 

Connect the Battery to the ESC.  Don’t force it, it only goes one way!

Starting your LiteHawk BLAST

-Plug in your Battery, then turn on the Power switch on the Radio, it will start blinking green and red.

-Then turn on the little red switch on the ESC. A red LED light will start blinking in the ESC. and if your wheels where turned to one side, they should snap to the center.

The vehicle is basically bound to the radio now.. just move any control and the lights will stop blinking in the ESC and remain solid. The Radio control will now be a solid Green.

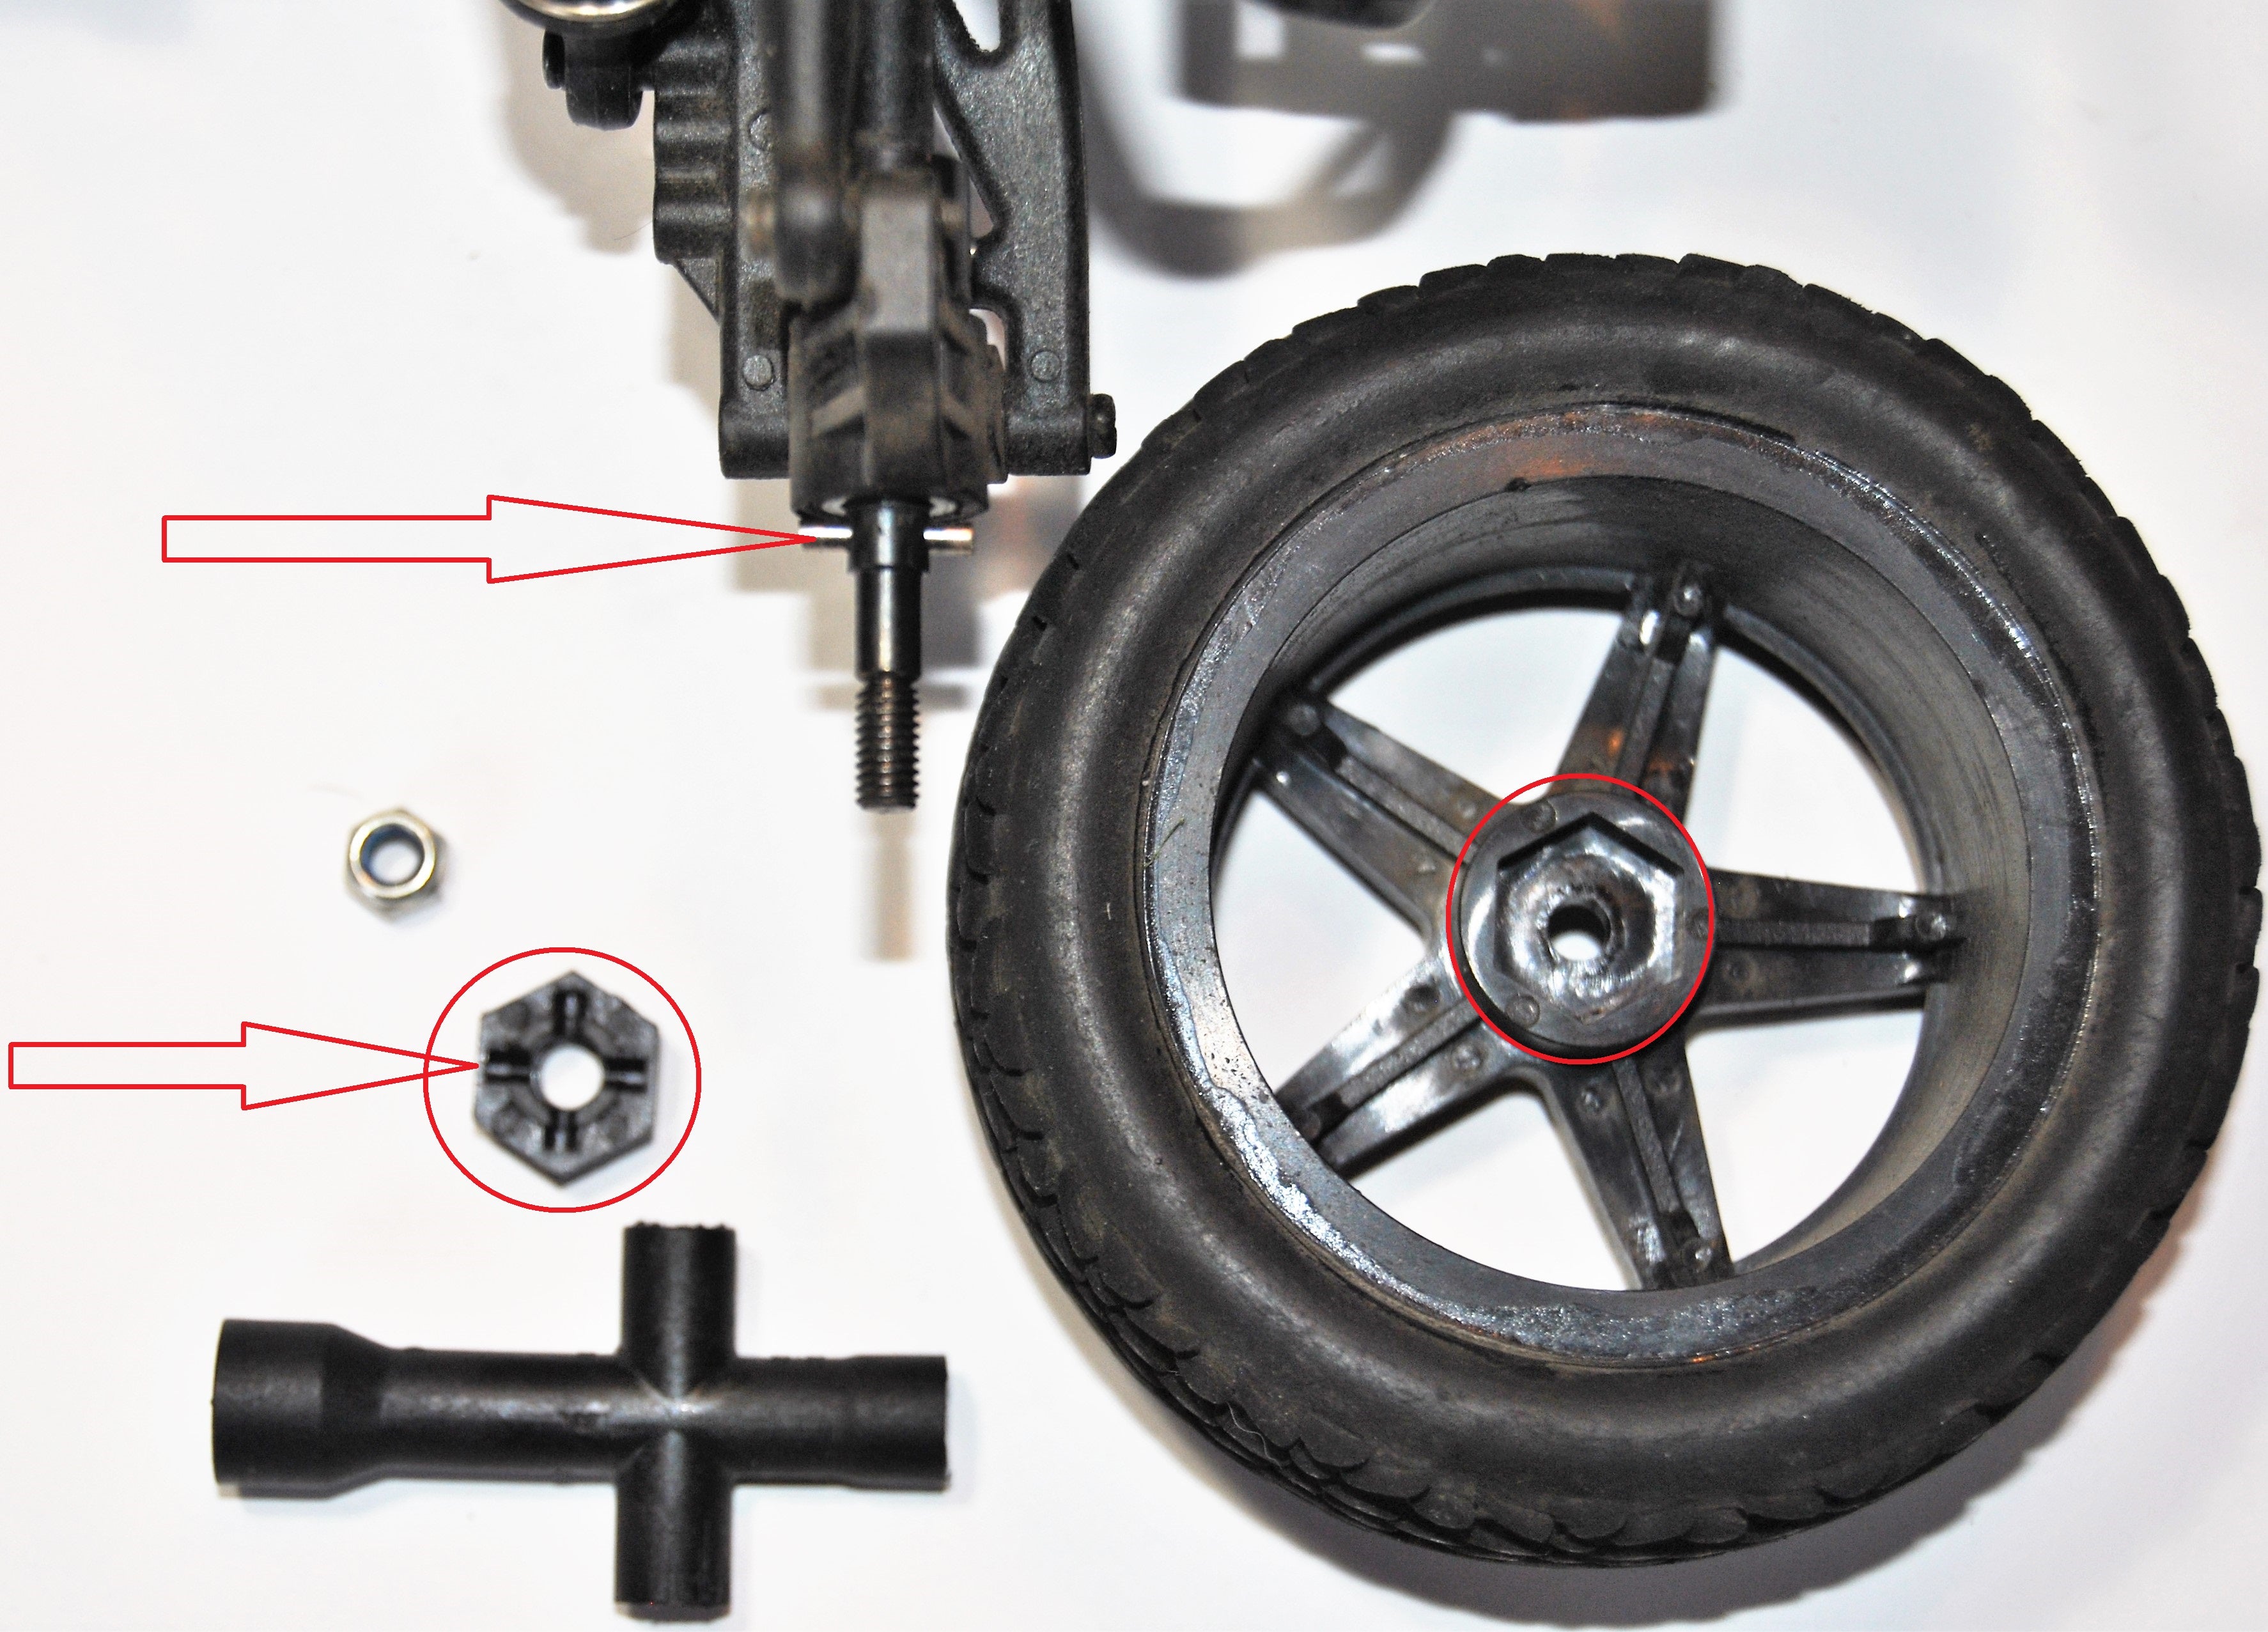
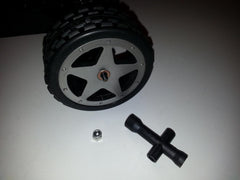
LiteHawk BLAST - Wheel Removal 

  •  Use the T wrench included with the BLAST, to unscrew the nuts.

  • It is a 7mm socket. Pull off the wheel. The Rear wheels are the drive wheels and they have a Hex nut that attaches the rear axles to the wheels with an axle pin. Take special care when removing these rear wheels not to lose these pins, as they can fall out very easily.

  • You can see how the Axle pin fits into a slot in the Hex nut, and the Hex nut fits into the Wheel Rim, which is all locked into position with the Ny-Loc Wheel nut. 
  • The front wheels are not drive wheels and do not have Hex nuts or Axle pins to worry about. Just remove the Wheel nut and pull off the tire.

LiteHawk BLAST - Care and Maintenance

When you are finished running your model for the day, blow it off with compressed air or use a soft bristled paint brush to dust-off the vehicle. Always disconnect and remove the battery from the model whenever the model is stored.
Your model is going to require maintenance in order to stay in tip top running order.
Check for the following:
1. Check the wheels and steering for binding.
2. Check the tightness of the wheel nuts with the wheel wrench.
3. Look for any cracked, bent, or damaged parts
4. Check for any loose screws in the chassis structure or suspension
5. Inspect the gears for wear, broken teeth.

LiteHawk BLAST - Storage

- Remove all batteries before storing your vehicle.
- Never store your LiteHawk BLAST near open flames, in high temperatures (including radiators) or in direct sunlight. Ideally, place the model in a warm dry location.
- Care must be taken when handling rechargeable batteries to avoid the possibility of injury and/or damage to property.
- Fully charge battery before storage.

LiteHawk BLAST - How To Replace Front Tires

LiteHawk BLAST - Servo Replacement

LiteHawk BLAST - Shock Replacement

LiteHawk BLAST - Front Ride Height Adjustment

To raise the ride height of the front suspension, locate the lower shock mounts. Note that the shock is mounted to the outer hole.
Unscrew the screw, and move the shock to the inner hole.
Do this on both sides, and you will have a higher ride height. 

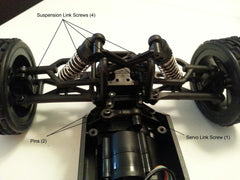
LiteHawk BLAST - Front Suspension Arm Replacement

  • First, locate the four screws at the front of the BLAST. 
  • Then, locate the three screws shown here. 
  • Unscrew the steering linkage and all other screws shown. The arms will come off. 
  • Reverse the procedure to re install.
LiteHawk BLAST - Front Shock Tower Replacement
  • Find the screws holding the shock tower to the chassis. 
  • Remove the upper screws from the shocks. 
  • Reverse the procedure to re install.
LiteHawk BLAST - Rear Shock Tower Replacement
  • Locate the rear shock tower. The two rear shocks are attached to it, at the top of the shocks. Locate screws holding the tower to the chassis and the shocks. 
  • Unscrew all screws holding it to the chassis and shocks. 
  • Reverse procedure to re attach.  
LiteHawk BLAST - Steering Knuckle, C-Hub, Wheel Axle Pin Replacement
  • Using the supplied Hex Socket Wrench, remove the Wheel Nut and remove Wheel. 
  • Remove the Suspension Link (tie rod) screw (1) and the Suspension Arm screws (2) as indicated. 
  • Remove the Pin Retaining Screw (1). 
  • Slide out the Pin and the sub assembly should just come apart - Wheel Axle Pin (285-420067), Steering Knuckle (285-420008), and C-Hub (285-420007). 
  • REASSEMBLY - Line up the notch on the Wheel Axle Pin with the Pin while remounting the C-Hub onto the Steering Knuckle. Once inserted, it locks the assembly together.
  • Replace the Retaining Screw. Replace the wheel and lug nut.
LiteHawk BLAST - Steering Servo Linkage, Steering Assembly, Suspension Links (tie rod) Replacement
  • Remove the clips and Canopy to allow access to the model. Remove the plastic Nose piece as shown below. Remove the Suspension Brace screws (2) and Upper Chassis Plate screws (6) as shown. Remove the Chassis Plate. 
  • Remove the Suspension Link screws (4) and remove the Suspension Links (285-420029). Remove the indicated Steering Servo screw (1). Slide out the Pins (2) to free the Steering Assembly (285-420015). 
  • The Steering Assembly is shown above. When replacing any or all pieces of the Steering Assembly take care not to over tighten the screws (2) so as to bind it's free action. 
  • Inserting screwdriver as shown below, remove the Linkage Screw to remove the Steering Servo Linkage (285-420029).

LiteHawk BLAST - Gears, Differential, Pinion, Motor removal

  • Remove screws from rear bumper 
  • Remove screws from lower chassis 
  • Remove screws from rear suspension link. 
  • Remove screws from front of gear case. 
  • Slide gear box out the back
  • Use hex key to loosen locking nut on pinion for removal. Remove motor mount screws to remove motor.